Reading time: 6 minutes
Hey legend,
By the end of this newsletter, you’ll know how to capture professional flatlay photos and videos at home using what you already have (or with a few optional extras).
Why bother with flatlay content?
If you sell a physical product online, your customers want to SEE what they’ll get before they pull out their credit cards.
So if you’re an e-commerce business that ships your products directly to the customer, establishing trust and credibility of your brand through high-quality visual content is non-negotiable.
Remember – if your customers won’t have a chance to physically inspect the product before they buy it, they’ll want to feel confident that what they’re purchasing matches their expectations (established through your content).
Think about it – when online shopping started blowing up, how much time did you spend looking at website photos to see if it was right for you?
And if they didn’t have many photos, you’d go to Google to look for product reviews or YouTube for “unboxing” videos to see how the products looked before you decided to buy them.
What is Flatlay Content?
‘Flatlay’ is a photography technique where objects are arranged on a ‘flat’ surface and captured from above.
These have become an increasingly popular content format on social media, as they’re an opportunity to present your products in a visually-appealing way that catches the attention of potential customers.
We’ll be covering 3 elements you need to know to nail your own flatlay content:
- Subject – how to make your product(s) the hero of your content
- Environment – how to set up a professional environment
- Equipment – how to position and coordinate your camera to capture your flatlay
1. Subject
Your product is the main subject or “hero” of your flatlay content.
So you want to ask and answer:
What is the story or overall theme that we want to convey to the viewer when they see the finished product?
After you’ve marinated on this thought exercise, there are 3 prompts I’ll guide you through to help accentuate your product as the focal point of your content and achieve the story/theme you desire.
Composition
This refers to what you’ll include in the makeup of your content.
🤔 Your prompt – Will your flatlay content feature a single product or multiple?
For single products
- I recommend centring your product within the frame.
- Why? This is a natural look for viewers, plus it provides enough surrounding space to include annotations, captions or titles when editing your content.
For multiple products
- I recommend shuffling around your products to achieve a ‘balanced’ look.
- Why? Creating a perfect symmetry is hard, so instead, aim for ‘visual balance’ by experimenting with the layout until you feel that the products are evenly distributed across the frame
Props
If your product is the “hero”, then what props or “supporting characters” will support them?
🤔 Your prompt – what props will help showcase the overall story of the product for my viewer or customer?
Some products may be best captured by themselves; others may benefit from being placed amongst complementary objects that reinforce the product’s usage, theme or your brand’s personality.
In this example, I created a flatlay photo as the thumbnail for a video focused on my ‘Best Travel Gadget‘ recommendations.
So to communicate the keywords of the title, my flatlay content focused on the following:
- Travel: I placed my travel wallet, passport & phone in the centre
- Gadgets: I then placed a handful of travel tech and devices around the travel items, such as my Kindle, AirPods, chargers, wallets and bags
Without reading the title of this video, the viewer can discern that this content will likely be related to travel and gadgets/tech gear.
In this example from Mango Street, they’ve used a variety of podium props and a wooden mannequin hand that implicitly communicate a brand personality that is modern, unique and quirky for their client’s skincare product.
Depth
Ready to take your flatlay content from amateur to professional?
Incorporating depth into your flatlay content figuratively and literally ‘elevates’ your product by adding a subtle touch of detail and realism.
🤔 Your prompt – what items do I have that I could place my product/s upon to give them height, shadows or a unique angle for the viewer?
Get resourceful – you don’t need flashy gear here, just everyday household items such as:
- Blue Tac
- Pieces of foam; or
- Charging brick
2. Environment
Let’s focus on contextualising your product to show its real-world usage, so your customer can visualise how they’d use it.
Remember – customers (like you) spend 99.9% of their time thinking about themselves.
So when they see your product, they’ll be thinking along the lines of:
“How will this fit into, or enhance, my life?”
…so make it easy for them to answer that question!
Here are 2 prompts to prepare for ahead of your flatlay content shoot:
Backdrop
Quite simply – what surface are you going to place your product on?
🤔 Your prompt: which environment best reflects the “story” or theme of my flatlay content?
Natural
If your product is more “utility” based, that is, it has a very practical or functional usage, then it’ll make sense to capture it in an environment where the customer can expect to use it.
In this example, I captured a range of photos and videos of my client’s digital business card (i.e. in-app QR code, Apple Watch widget, NFC business card).
I used multiple tabletop surfaces as my flatlay backdrop, as you can expect business people to meet and exchange their contact details over a table in professional settings.
In this example, I captured my client’s co-sleeping pillow product in the environment the customers would be using it – their bed!
Studio
Suppose your product is more of a “luxury” or designer item.
In that case, you should consider curating a professional “studio” look, which is more affordable than you may think and can be re-created at home.
In this example, I captured photos and videos of my partner’s hand-made ceramics shop by purchasing 2 x A3 coloured boards from Officeworks (or your closest arts and craft shop) that came to ~ A$2.30 for 2 boards..
Then I typically position them at a perpendicular angle (90 degrees), propped up by a drink bottle (or any sturdy household item you can use)
Lighting
Let’s illuminate your product with the best lighting possible.
🤔 Your prompt – what can I work with to ensure I’ve got the best lighting in the environment of my flatlay content?
Natural
Sunlight, called ‘natural’ light, is my preferred and go-to light source as it’s abundant, soft and feels more familiar to the viewer.
As much as possible, I’ll capture my flatlay content during the daytime when lots of sunlight is streaming through the windows of my home office.
Artificial
Alternatively, you may have limited access to natural light, so relying on indoor lights such as desk lamps, room lights, or studio lights (i.e. photography/videography lights) may be the best option.
In this example, I hired a popular videography light called the Apurture 120D for a client shoot. It came with a light stand and dome at ~A $85/day from a local photography equipment rental company.
Or if you’d like to invest in a solid and affordable entry-level light that’s ultra-portable, lets you control the colour temperature (warm to cold) and delivers a lot of light, you can consider an LED light such as the Falcon Eyes SO-28TD LED light (the one I use) that comes to ~A $200.
Equipment
For years, I didn’t understand how to set up my camera to capture flatlay content and didn’t see many creators sharing the ‘behind-the-scenes’ of their setup.
So after years of trial’n’error, I’m sharing all the options I’ve used to position my camera so you can review and pick the right one for you.
🤔 Your prompt – what do I need to place my camera in the best position to capture the flatlay content?
Handheld
If you’ve got a simple setup with a single product (or just a few) and your flatlay doesn’t require your hands to be within the composition, hold your camera in your hands and snap away!
Tripod
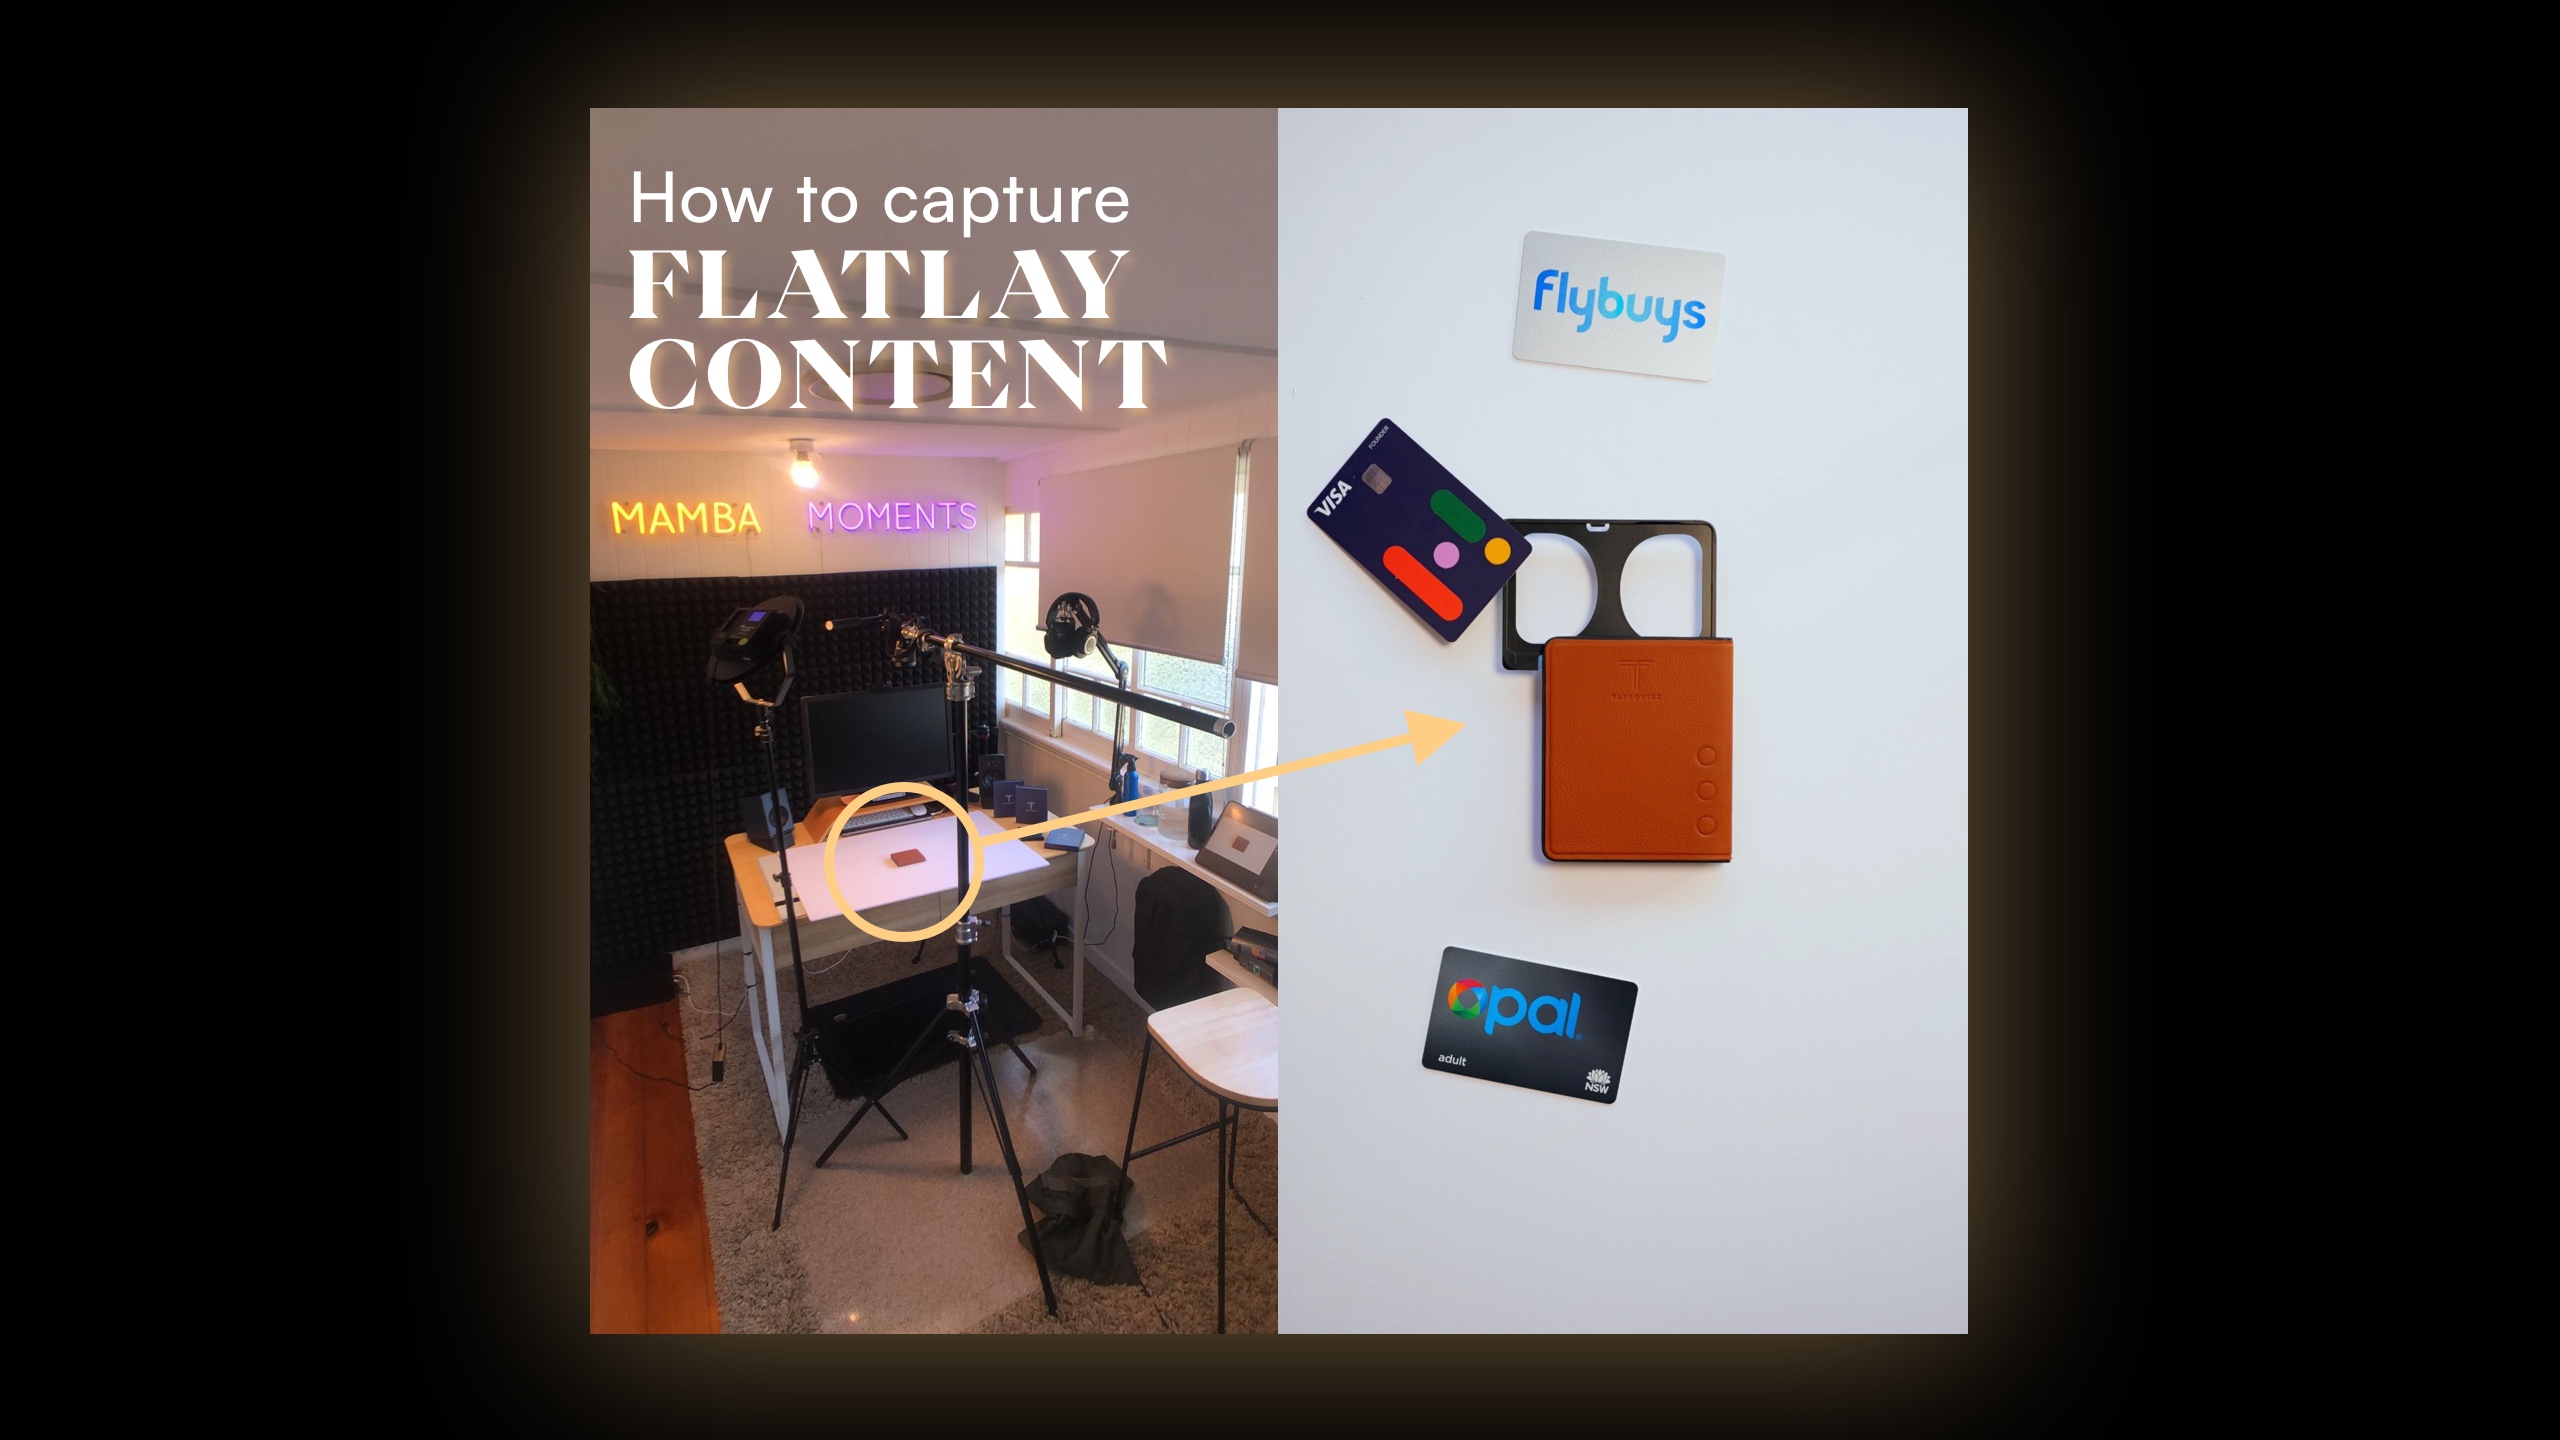
If you plan to have a more complex flatlay with multiple products and props, I recommend setting up a tripod to lean/tower over the flatlay so your camera remains in the same position.
That way, you can focus on adjusting or tweaking the flatlay with the peace of mind that all your photos will have the same framing.
Tabletop Mount
If you don’t have a tripod (or plan on getting one) or your tripod isn’t capable of a sturdy position above your flatlay, you can purchase a tabletop clamp (or a microphone boom arm).
This setup is quite flexible and perfect if you have a smartphone, given how lightweight they are.
In this example, I’ve attached a smartphone clamp (JOBY GripTight Pro 2 Mount) to my microphone boom arm (Rode PSA1 Professional Studio Arm) to place my smartphone in a vertical orientation.
Alternatively, you can purchase a desk mount with a holding arm, such as this JUSMO Desk Mount from Amazon for ~A $80
Professional Mount
If you’re using a professional camera (DSLR/Mirrorless), then one of the previously mentioned tabletop clamps won’t support it.
In that case, it’s worth investing in a sturdier boom arm (or light stand) that can mount a camera horizontally.
If this applies to you, you can pick up a Neewer 2-in-1 Boom Arm Stand and Sandbag from Amazon that comes to ~ A$90 and includes a sandbag to offset the camera’s weight.
So to nail your flatlay content, answer these:
- Subject – What will be the composition, props and depth for my content?
- Environment – What is the backdrop and lighting I’ll require?
- Equipment – Will my camera capture the content being held by hands, a tripod, a tabletop or a professional mount?
Most importantly – don’t expect you’ll nail your first flatlay…
My first attempt was a shocker… so I’m glad my client was patient and trusted me to get it right (eventually).
Over time though, flatlays have become one of my favourite pieces of content to create, so tap into your inner Marie Kondo and make some remarkable flatlays for your products!
See you at the next one,
🕺🏽 Mamba
Affiliate Disclaimer: If you click on some of the images/links in this email and make a purchase, I earn a small commission (at no extra cost to you)


